Monday, July 22, 2013

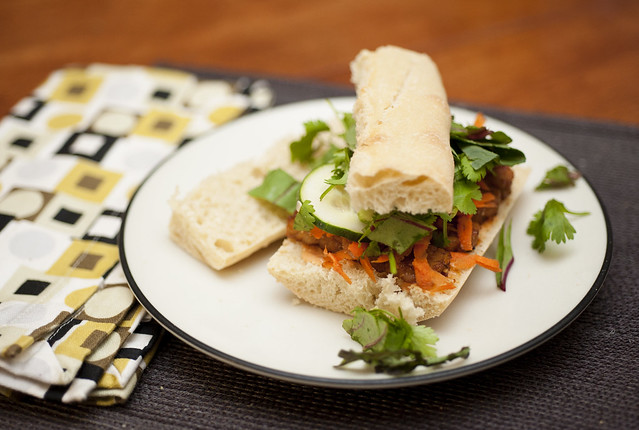
Tempeh Banh Mi

Hey! Remember when I blogged regularly? Yes, that was long ago. One of my new projects is to remember to blog more not just photo stuff on the business blog, but fun other stuff as well. So, we'll see if I can keep things up!

Anyhow, Vermont winter was beautiful, and then there were crazy adventures in Asia, and then summer exploded with busy. However, I did whip up these sandwiches the other night, and was mighty pleased with how they turned out. So I figured I might as well share them!
_7002096

Montpelier has a lovely co-op that we shop at all the time, and they even have a sandwich bar if you're feeling fancy. One of the sandwiches I've ordered from them is the Tempeh Banh Mi. And it's AWESOME. I was a little scared at first, as I sometimes am of weird things, but it turned out to be well worth the fright. I was craving one the other night, but figured it'd be worth trying make on my own.

A little of this, and a little of that, and success! Thus, I give you my sandwich creation, easy and healthy all in one!

Ingredients:

1 Tempeh cake
2 garlic cloves, minced
1 TBS grated fresh ginger
1 loaf fresh baguette or ciabbata
soy sauce
rice vinegar
hoisin sauce
chili sauce
sesame oil
cilantro
grated carrot
sliced cucumber
avocado (I know this isn't normally on banh mi, but avocado is delicious so whatever)
chopped salad greens
spicy mayo (mix the mayo of your choosing with sriracha) 

Make the marinade: (Note, I didn't actually measure any of this, so just go with your best judgement) 
Take a long tupperware or shallow pan and add about 1/4 to 1/2 cup of soy sauce, enough to fill the bottom. Add a TBS or 2 of rice vinegar, hoisin sauce, a tablespoon of sesame oil, a bit of chili sauce like sriracha, and the garlic and ginger. Whisk together. I also added a bit of some sweet and sour chili sauce we had in the fridge.

Thinly slice the tempeh and place the strips in the marinade. Swish around so everything is covered with sauce and place in the fridge for 30-60 minutes.

Once the tempeh has marinaded a bit, you can just dump everything into a frying pan and saute for about 4-5 minutes.

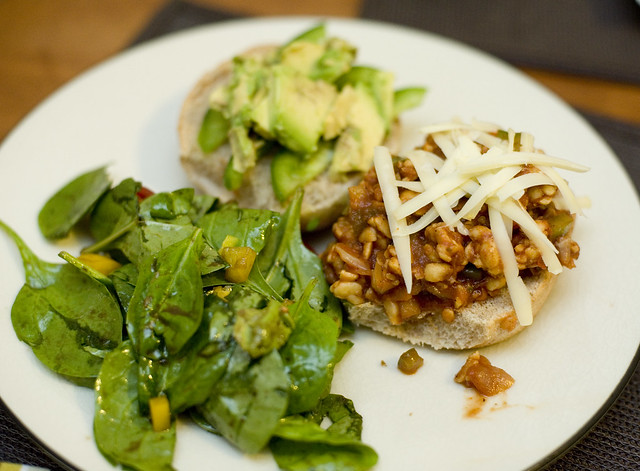
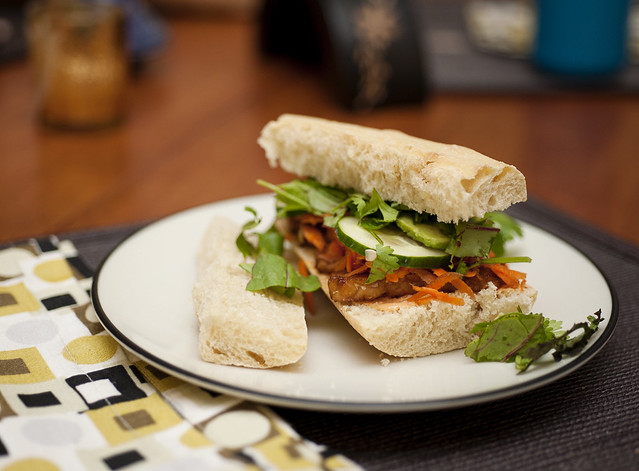
Lightly toast your bread if desired, layer with spicy mayo, cooked tempeh, grated carrot, cucumber, and a bit of cilantro and greens or avocado and enjoy!
_7002097


Tuesday, February 12, 2013

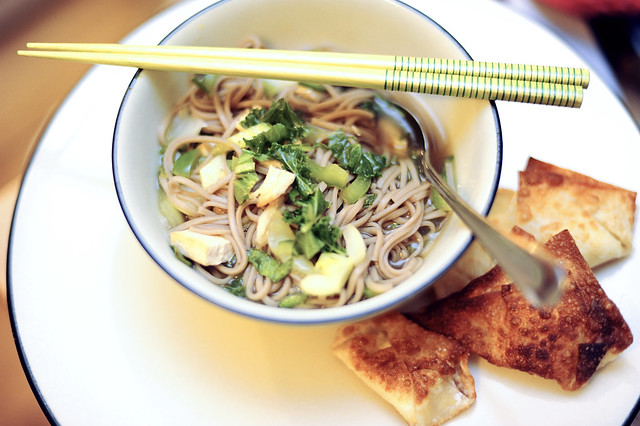
Soba Noodle Soup

While out wandering one of the old bookstores in town, I came across this new Martha Stewart cookbook. I had good experiences with my other Martha book, so I figured this one would be worth a shot as well. If I'm honest, I mostly like that her cookbooks have a photo of every recipe, but it's also nice that they tend to be easy and delicious!

I saw a recipe in the cookbook for soba and tofu in ginger broth, it looked delicious. I'm a huge fan of miso soup, and while this isn't that, it does taste very similar. It's comforting and wholesome though not at all heavy, and just plain delicious for a cold night.

I adapted the recipe for what we had and it turned out wonderfully, we'll be making this again for sure. Along with the tasty cream cheese puffs! :-)

Soup

Soba Noodle Soup
Adapted from Martha Stewart Kitchen's: Meatless 

1 onion, quartered
1, 3 inch piece ginger, peeled and thinly sliced
2 garlic cloves, smashed
1/4 cup soy sauce
1 TBS rice vinegar
1/2 block firm tofu, drained and pressed,
salt
6-8 ounces soba noodles
1 head baby bok choy, thinly sliced
1 bell pepper, sliced thinly and roughly chopped
1 handful kale, finely chopped
1 jalepeno, ribbed and diced
8 cups water

In large pot, combine onion, ginger, garlic, soy sauce, vinegar, and water. Bring to a boil and then reduce to a simmer covered. Allow to simmer about 15 minutes.

Meanwhile, slice the tofu into thin strips, then season with salt/pepper and saute or grill until lightly browned. Once cool enough to handle, dice into smaller pieces.

Once the broth has cooked, remove the solids with a slotted spoon. Then add the soba noodles to the broth, and cook until tender. Just before they finish, add the vegetables and tofu to the broth and cook another couple minutes until the veggies are cooked, but still slightly crisp. Enjoy!



Sunday, January 20, 2013

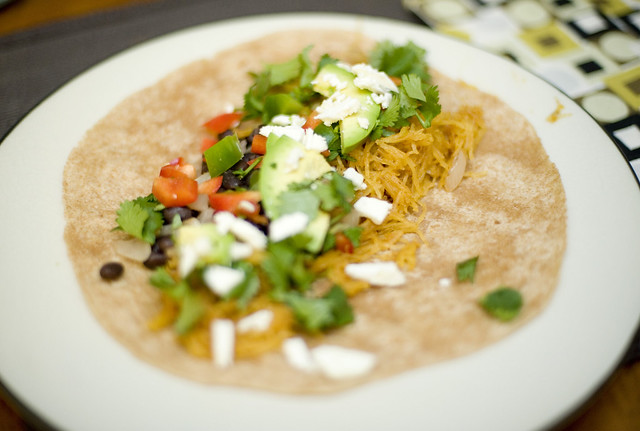
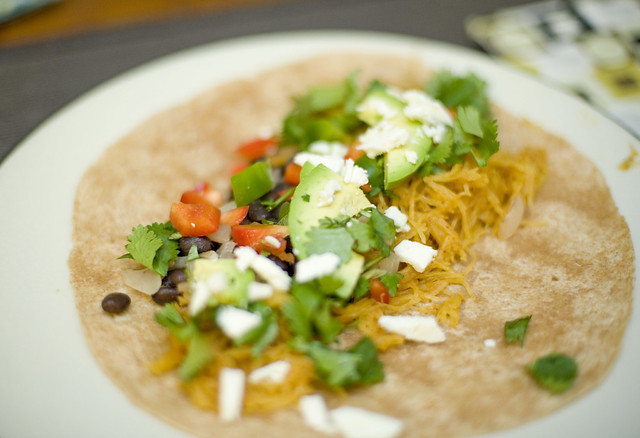
Spaghetti Squash & Black Bean Tacos

Along with loads of other people, I also got the Smitten Kitchen cookbook for Christmas. I'm a big fan of her blog, so I was excited to try out the new recipes in the cookbook! She has a pretty good veggie friendly section, and as that's what we're eating most of the time in this house, I was pumped to try some out.

SquashTacos1

Upon seeing this recipe, I wasn't quite sure what to think. We're a big fan of lentil tacos, so I'm not unfamiliar with meatless mexican, but this was a new one for sure. However, I'll try anything once, and having faith in Deb, I gave them a try. Super tasty! I highly recommend these, as weird as they might seem, because A. It's always fun to cook with spaghetti squash, B. Super duper healthy C. Mexican delicious = an excuse to make margaritas, right? Win win.

So, I altered the recipe some to my liking, and loved the results, so here you go!

Spaghetti Squash and Black Bean Tacos
Adapted from Smitten Kitchen Cookbook
1 medium spaghetti squash
1 can black beans, drained and rinsed
1 yellow onion, diced
3 cloves garlic, minced
olive oil
1 tsp chili powder
1/2 tsp cumin
1/2 tsp coriander
1/2 tsp salt
dash of cayenne pepper
juice of 1 lime
feta cheese
tortillas (I prefer flour tortillas, but feel free to use whatever you like)

Toppings:
diced bell pepper
avocado
chopped cilantro
dash of your favorite hot sauce

Split the squash and scoop out the seeds. Coat the flesh with olive oil and roast flesh side down on parchment lined baking sheet at 375 about 40 minutes until softened.

While the squash is baking, saute onions and garlic in a bit of butter or oil until softened. Add the black beans and saute another couple minutes.

When the squash is finished baking, using a fork, scrape out the flesh and empty into a bowl. Add the spices and the lime juice and mix well to combine.

To craft your tacos, fill with squash, top with the black beans and onion, and then top with diced bell pepper, avocado, cilantro and crumbled feta. A dash of hot sauce or even a dollop of sour cream are excellent choices.

SquashTacos2

Enjoy! 

Sunday, December 9, 2012

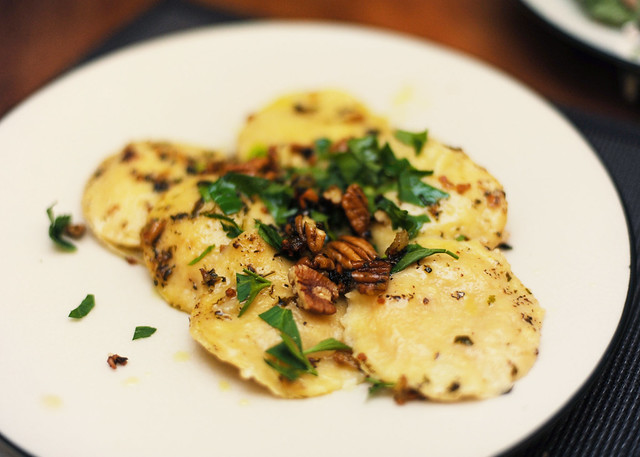
Butternut Squash Ravioli with Sage Brown Butter Sauce

For some crazy reason on Friday afternoon, after a morning of editing lots of photos, I decided that I wanted to make something fun for dinner that evening. I had gotten a new cookbook a month or two ago with a random giftcard I had, and I'd been meaning to make something from it. This cookbook is quite the hefty tome, so while I'd paged through it and read good reviews before I made the purchase, I hadn't really gotten into any of the recipes.

Over lunch I decided pasta sounded good, and this recipe looked perfect. I've been wanting to make my own pasta since forever, but have never gotten around to it, so I figured what the heck?

You guys. OMG. This was THE. BEST. DINNER. I have made ever. in my life. Both Alex and I agreed this was fantastic. I was thoroughly proud of myself after making all the pasta from scratch as well! Other then Christmas Ostrich, and I suppose orchestrating an entire Thanksgiving feast in a square foot Brooklyn kitchen, it's certainly one of fanciest dinners I've crafted. This is not an easy weeknight meal, but if you're looking to impress, or just spend some loving time in the kitchen, this dish is for you. It took me a good couple hours to pull this off, but the reward was well worth it. :-)

Ravioli

Butternut Squash Ravioli with Pecans  and Sage Brown Butter Sauce
Adapted from Vegetarian Cooking for Everyone, Deborah Madison 
(Serves 2-3, about 14 large raviolis. However, I had lots of leftover filling. If you made more pasta and this could go way farther) 

Filling:
1 butternut squash
1/2 cup bread crumbs
1/2 cup freshly grated Parmesan cheese
1 tbs butter, softened 
salt/pepper

Pasta:
2 cups flour
2 eggs
pinch salt
2 tsp olive oil 

Sauce:
6-8 TBS butter (I went for the full stick. Butter makes everything better. :-) )
2 TBS freshly chopped parsley
3 TBS freshly chopped sage leaves
1 TBS chopped fresh thyme 
1 shallot, finely diced
2 cloves garlic, minced 
1/3 cup roughly chopped pecans (you can toast them if you like, I didn't)

Start by roasting the squash. Slice it half, scoop out the seeds, brush with olive oil, then roast cut side down on a parchment lined cookie sheet at 375 until tender, about 45 minutes.

While the squash is roasting, prep the pasta. I don't own a pasta maker, or a large enough food processor, so I made this stuff the old fashioned way, completely by hand with lots of muscle. :-) If you have the technology, go for it. But, if you're like me... On a clean counter or cutting board, place flour in a mound and then make a bowl in the center. Add the eggs and olive oil and a pinch of salt. Then using a fork and then gradually hands, gently fold things together and work in the flour. Keep kneading until all the flour is combined. Work the dough into a ball and then place in a plastic bag to rest in the fridge 10-15 minutes at least. After the dough has rested, roll it out as thin as you can get it. I did mine in sections so it would stay cool. Once it's rolled out, I used a small juice glass to cut out the ravioli circles.

 To make the filling:
Once the squash is roasted and cooled, scoop out two cups worth of squash. Beat together ( I used an immersion blender to get it nice and smooth) with 2 TBS butter and season with salt and pepper, then add in the cheese and bread crumbs.

To fill the ravioli, add a spoonful to a pasta circle, top with another, then seal with your fingers and a bit of water.

Cooking:

Sauce: Add the butter, herbs, and shallot and garlic to a deep sauce pan. Cook over medium heat, continuously stirring while the butter cooks. Continue to heat until it lightly browns. Once the butter browns, add the pecans and continue to cook another minute or two.

While the sauce cooks up, cook the raviolis in a pot of gently boiling salted water about 4-5 minutes. Drain carefully.

Add the raviolis to the sauce, cook another 30 seconds or two. Serve topped with freshly chopped parsley, a few extra pecans, and fresh grated cheese.

Enjoy with some tasty wine! Happy dining! :-)


Wednesday, November 28, 2012

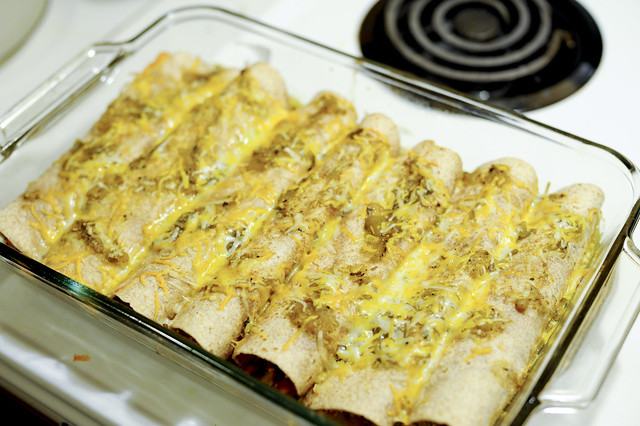
Black Bean and Sweet Potato Enchiladas!

I hope you all had a great Thanksgiving! I thought I'd get a new recipe up here and have some other ones coming soon as well!

These enchiladas are from my friends Alex and Sonja, who if you don't follow their blog, really kids, you need to get on that!

This recipe makes a TON. We got a few lunches and two dinners for both Alex and myself out of these, which is hard to do in this house. And, it's super easy, cheap and extra healthy. WIN!

_7006934


Black Bean and Sweet Potato Enchiladas
Adapted from A Couple Cooks

2 Sweet Potatoes, peeled and finely diced
1 15 oz can black beans, drained and rinsed
1 yellow onion, finely diced
8 ounces diced canned green chilies
1/4 cup quinoa
1/2 TBS cumin
1 tsp chili powder
1/2 tsp garlic powder
1/2 tsp salt
1/4 tsp crushed red pepper
Jar of salsa verde or tomatillo salsa of your liking
Shredded cheese (some sort of mexican blend or cheddar works great)
whole wheat flour tortillas
sour cream for serving

Heat your oven to 350.
Cook your sweet potato... Place in a sauce pan covered with water. Bring to a boil and cook until tender. 10ish minutes or so.
Cook the quinoa, 1/4 cup quinoa to 1/2 cup water. Bring to a boil, reduce heat and cover. Simmer until the water is cooked away.
In a bowl combine the black beans, spices, onion, green chiles. Mix to combine. Once the quinoa and sweet potatoes are done, add those to the mix and stir everything together.
In a 13x9 baking dish, add about 3/4 cup of salsa on the bottom. Now add your filling, a spoonful of salsa and a bit of cheese to a tortilla, and roll it up. Place it seam side down in the baking dish. Continue filling tortillas until the dish is full. (I got two full pans out of this, 12-14 enchilladas). Add a bit more salsa over the top and sprinkle with cheese.
Bake in the oven about 20 minutes. Serve with a dollop of sour cream!

_7006936


Enjoy!



Monday, October 1, 2012

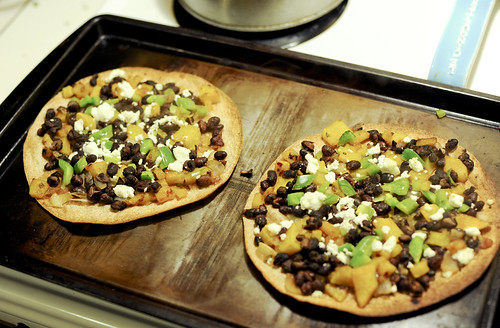
Butternut Squash and Black Bean Tostadas

I recently discovered Naturally Ella's blog via my friends over at A Couple Cooks. So many tasty things!

I bought a butternut squash at the farmers market last weekend and had been looking for some new ways to use it, so when I saw this recipe, it looked just about perfect! The only thing I would change is to add more squash and increase the recipe a bit, it didn't make quite as much as I had hoped. Only enough for three tostadas, however, they were pretty hardy, so it worked out.

They turned out delicious! We'll be making this again for sure!

DSC_2294

Butternut Squash and Black Bean Tostadas
Adapted from Naturally Ella

roughly 2 cups butternut squash, peeled and diced
1 yellow onion diced
1 jalapeno, seeded and diced
1 can black beans, drained and rinsed
1/4 cup diced bell pepper 
juice of one lime
olive oil
salt
.5 - 1 tsp crushed red pepper
1 TBS honey
tortillas (we used whole wheat)
goat cheese

Toss squash, onion and jalapeno with a TBS or two of olive oil, a bit of salt, and crushed red pepper to taste. Spread on a parchment lined cookie sheet and bake at 425 for about 30 minutes until starting to brown.

Once the squash mixture has baked, mix in a bowl with black beans, lime juice, another TBS of olive oil, and 1 TBS of honey.

Place tortillas on a cookie sheet, top with squash bean mixture, diced bell pepper, and goat cheese. Bake another 5-8 minutes, until cheese is melty and tortillas get crispy.

Enjoy!

Thursday, September 27, 2012

Fall Leaves!

Happy Fall!

I needed to take a quick break from editing yesterday and decided to grab my camera and take a walk around the neighborhood. I'm trying to be better about taking photos for me, so hopefully more fun photo posts to come.

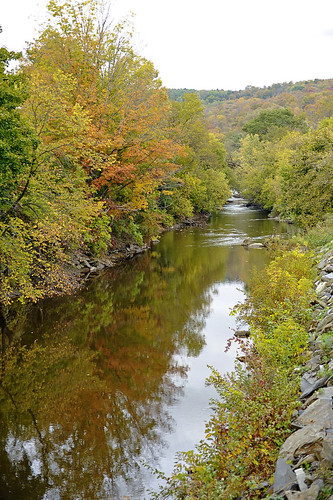
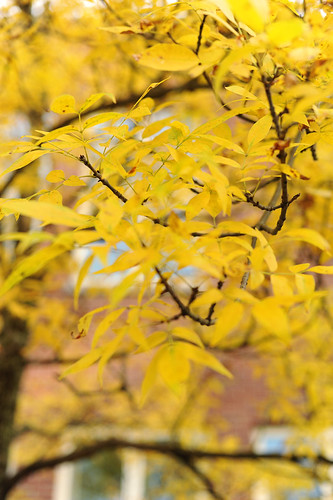
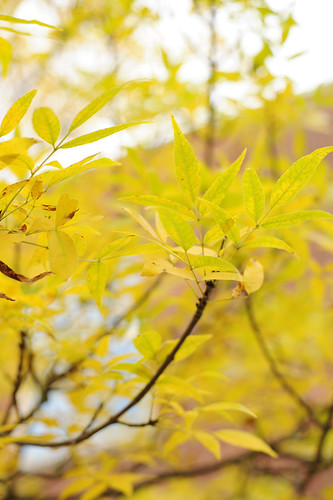
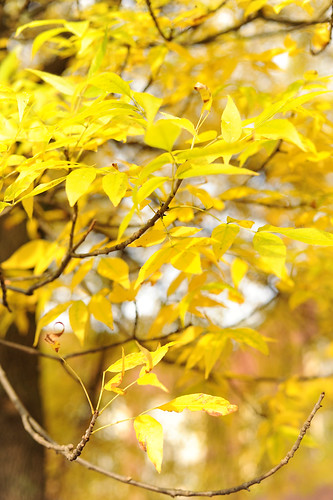
This past week or even in the past day or so the fall colors in Vermont have absolutely exploded. It's amazing. Today I took the train down to the city for a wedding and just stared out the window for a good hour just marveling at how gorgeous everything looked.

I'm hoping to head on a bigger hike this weekend weather permitting, so hopefully lots more photos on the way.

DSC_1537

DSC_1543

DSC_1544

DSC_1547

DSC_1555

DSC_1569
Yes, this river view is in downtown Montpelier, this is just looking away from town. Vermont is a pretty fabulous place to live. :-)

DSC_1573

DSC_1576

DSC_1578

DSC_1581

DSC_1588

Hope you're enjoying the season!


Monday, September 10, 2012

Vermont! The New Place!

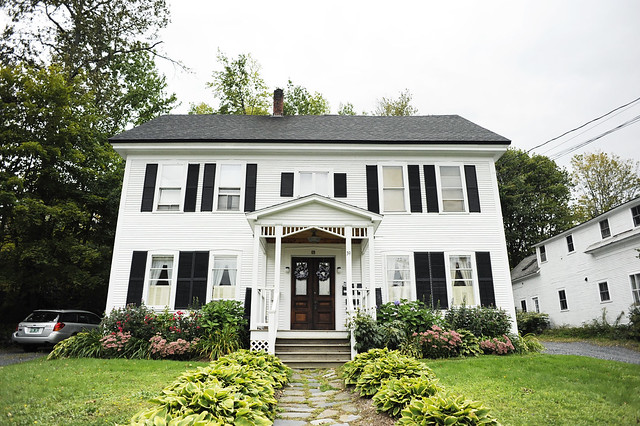
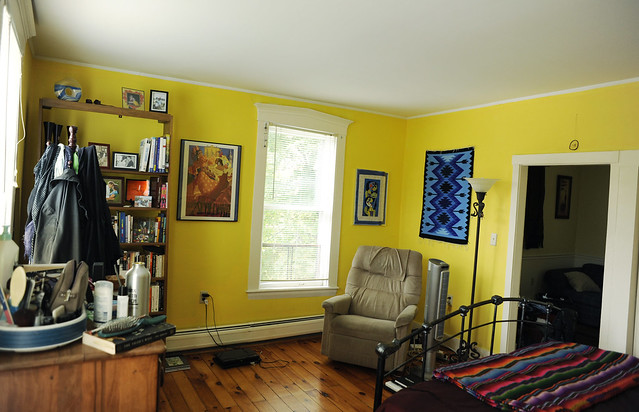
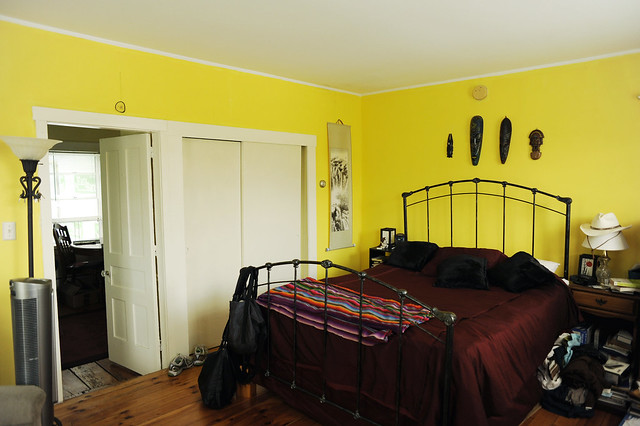
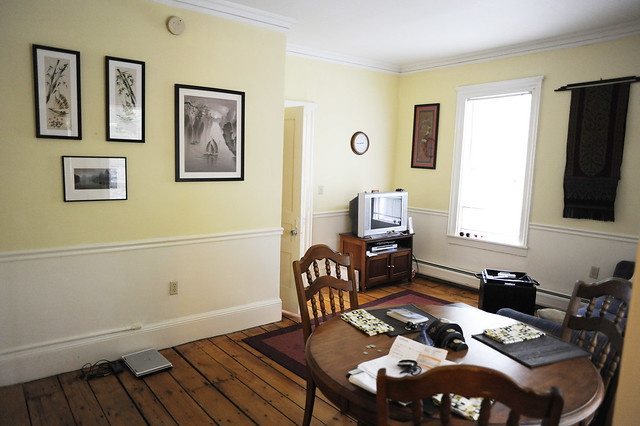
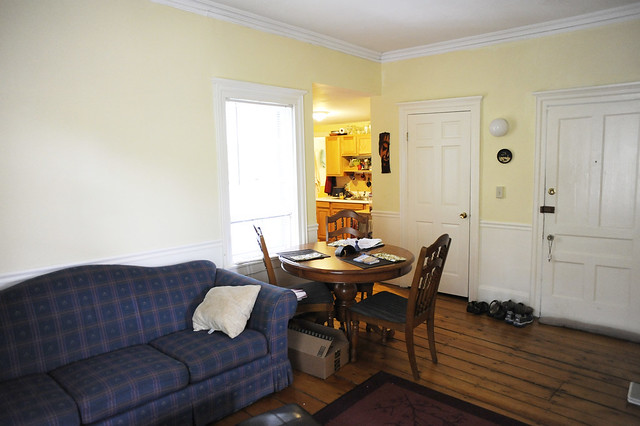
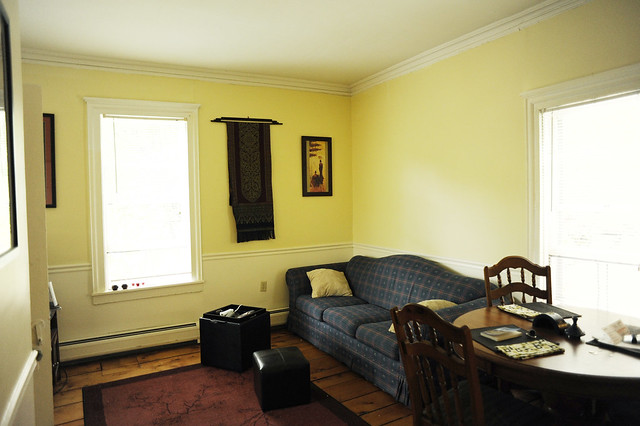
The post you all have been waiting for I'm sure! :-) I've been crazy busy with the photo stuff, but figured I'd take a little break today to give you a peek into our new space up in the north country! We finally have mostly settled in and gotten most of the art up on the walls and such. There's still a few things left and the back bedroom still needs to be settled, but for the most part, it's pretty set up!

First off, I knew I was missing having space in Brooklyn, but holy moly I can't even begin to explain how nice it is to just have ROOM again. To have THREE closets! To not be a cluttered mess even when everything is clean is awesome. Also, since I'm working from home now most of the time, it's been wonderful to have such a sunny apartment to be in!

_7003840

We're living on a nice little street just two blocks from downtown. It's been great as Alex takes the car most days, but I can still easily walk anywhere I need to go. The coop, grocery store, gym, library, stores, post office, whatever. They're all about a 10 minute walk at most.

Alex said one day that Montpelier is kind of like a cute little hippy Brooklyn neighborhood that got dropped in the middle of the forest. And I think that's about the best description ever.  The stores are all independent, lots of thrift shops and little boutiques, the restaurants are amazingly delicious, and there's a wonderful farmer's market on the weekends! All surrounded by amazing mountain scenery. It's seriously idyllic. Are you coming to visit yet?? :-)

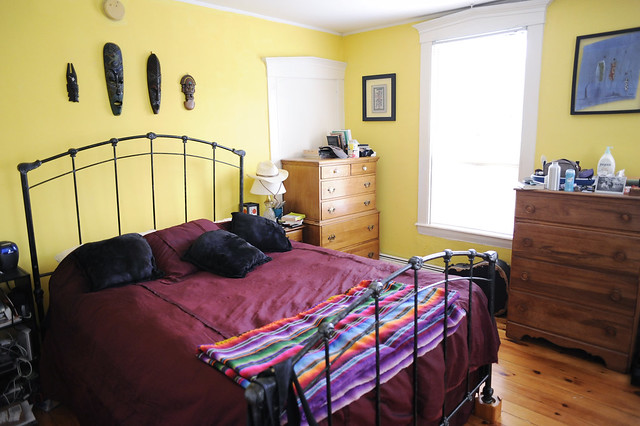
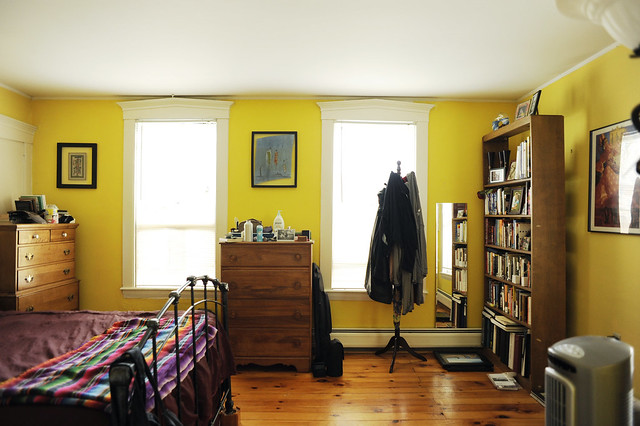
Bedroom:

_7003837

I LOVE how sunny our bedroom is. It's so great to work in during the day.

_7003789
Seriously ginormous compared to our bedroom in Brooklyn.

_7003791

_7003792

Living Room:

_7003830

I'd like a little coffee table, but Alex has been anti the idea for the time being. So for now, we have storage ottomans from amazon that have actually been pretty nice. 

_7003832

I want to print some canvases to hang behind the couch!

_7003796

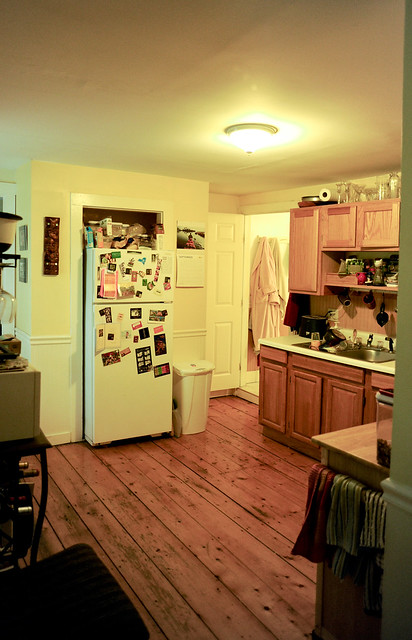
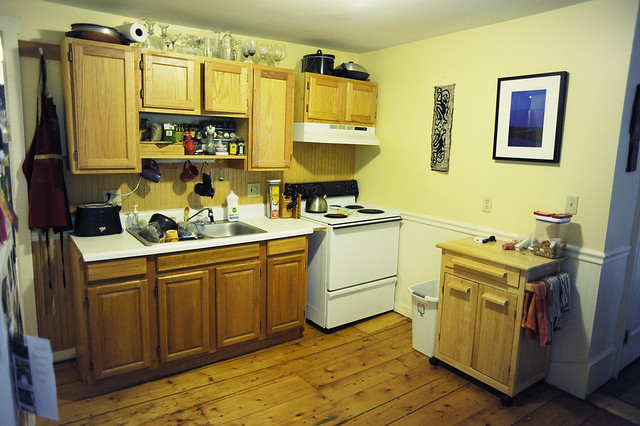
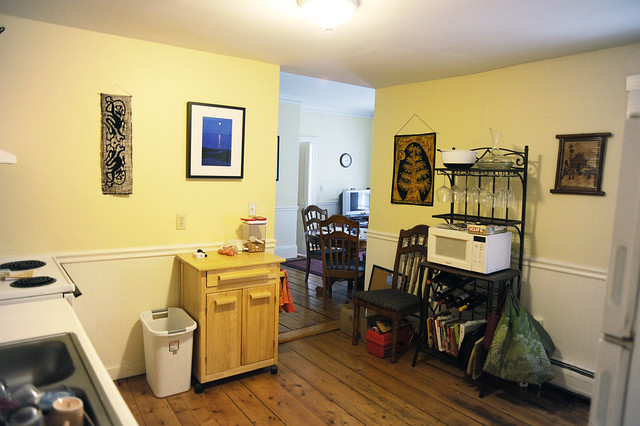
Kitchen:

_7003801
Sorry, the light is funky.

_7003805
Electric stove, boo. But I'm making it work!

_7003811

Bathroom:

_7003816

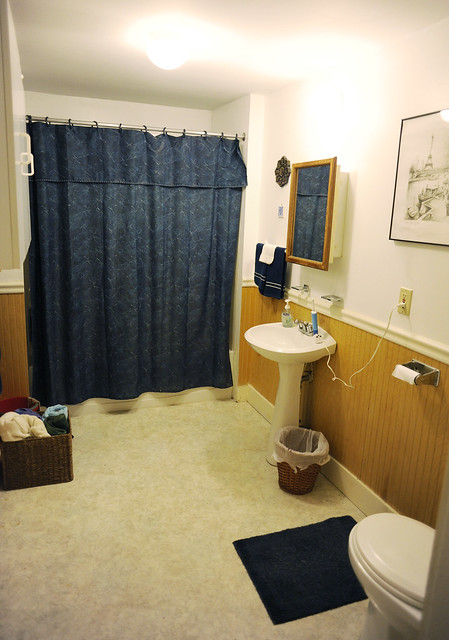
Our bathroom is kind of silly big, but has the tiniest pedestal sink. I don't really get it, but whatever. I'm happy for the room!

Second Bedroom!!

_7003826

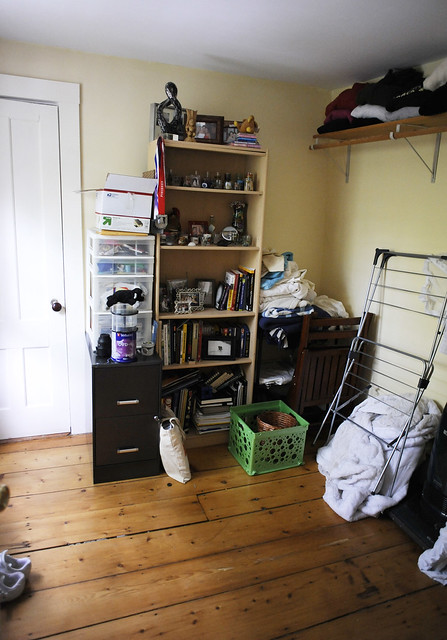
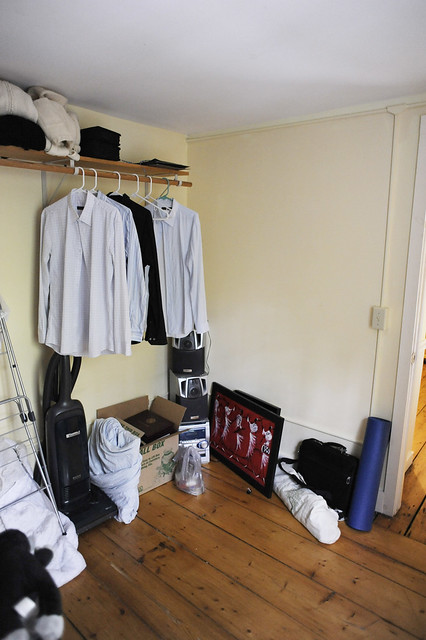
Still not finished as you can see, and it's teeny. But hopefully maybe we can squeeze an air mattress or something in here if anyone stops over. For now it's mainly for drying laundry and storage. But it's great to have.

_7003824

Next up I promise to have more recipes and a tour of the neighborhood and pretty photos. For now, stop over at the photo blog for views of my latest hike up a mountain!


Friday, July 6, 2012

Fun Times in The City!

So as our time in NYC is winding down, I have been on a quest to get as much city fun as I can before we head out to the Vermont countryside. We actually made a list of things to do in NYC before we moved here, and I have to say, we've done a very good job at knocking off most of them.

This past June in particular was pretty amazing in terms of awesome NYC things. I got to eat at two absolutely amazing restaurants, Momofuku Ko AND Brooklyn Fare. Seriously, these were two of the most awesome culinary experiences ever. If you have the chance, GO. Now.

Additionally, we had loads of fun with some sailing and trapezing! For Alex's birthday this year, I was at a loss for what to do. Then I saw a post on Cup of Jo on sailing, one of my favorite NY blogs, and knew I had found the event! Alex and I don't often exchange gifts, especially for birthdays, we're more "do cool things" over "get more stuff" sort of folks, so a sunset sail on the Hudson was perfect.

IMG_1065

I had gone on a Circle Line boat cruise before around the harbor, but this was SO much cooler. I'm fairly certain it's one of my favorite things we've done in the city. I met Alex on 22nd street and 10th as a surprise and then we walked out to Chelsea piers. You can bring along a picnic, which I highly recommend doing. I stopped at Num Pang in Union Square (best sandwiches in NYC, no question) and also picked up dessert at Chelsea Market.

IMG_1075

For the cruise they take you out on a gorgeous sail boat, one of the old school beautiful schooners. Our group was fairly small, maybe 12-15 of us on the boat, and our evening was perfect! It was a clear night, there was lots of wind for sailing, and there were even points where we were nearly at a 45 degree angle going around a curve. Super fun! Along with the picnic, they also serve unlimited drinks on board. Wine, champagne, and beers. While they say it's not meant to be a booze cruise, we never had an empty glass the whole 2 hours. :-)

IMG_1073

I didn't bring my DSLR, but did manage to snap a few photos with my cell phone and with our little point and shoot camera. The views were gorgeous!

IMG_1072


SunsetSail
I love this one. The boat in this photo is just like the one we were on. 

Our second fun adventure was trapeze! Again at the suggestion of Cup of Jo, as soon as I saw it, I knew this was something I needed to do. SO MUCH FUN! I pretty much wanted to immediately join the circus. It was a deathly hot day when we went, but being on the water there was a decent breeze. And when you're flying through the air, we barely noticed it.

IMG_1099

IMG_1096

IMG_1110

IMG_1118

We learned a basic knee hang, a flip off the bar to dismount, and got to try a few catches. The instructors here were fantastic teachers and incredibly friendly. I would completely recommend this place to anyone coming to the city! I know I'll be back!

 IMG_1101

IMG_1111

So hard to believe we only have about 3 weeks left! Get ready for loads of post from green mountains, as I'm hoping my free time will actually start to exist! Hurray! :-) 


Thursday, May 10, 2012

Tempeh Sloppy Joes

Oh HEY blog. How's it going?

So when we were in San Francisco a couple weeks ago, ( yes, I know, I'm awful at giving you travel photos. I will do it sometime this year. PROMISE.) Alex and I went to this really cool cafe by our hotel for lunch and Alex had this fantastic sandwich. Afterwards I promised to give it a shot at home, and here's what I came up with! Alex devoured two of them, and the one I had was mighty tasty, so I'd say that was a success! Take that making up recipes!

Tempeh Sloppy Joes!

Ingredients:
 1 onion, finely chopped
1 celery stalk, finely chopped
1 bell pepper, chopped
approximately 1/4 cup grated carrot (I didn't actually measure, this is a guess)
5 garlic cloves chopped
1 15 oz can tomato sauce
1/2 tsp chili powder
1 tsp cumin
1 TBS red wine vinegar (plus an extra splash)
1 TBS soy sauce (plus an extra splash or so)
1 TBS Worcestershire 
dash of red pepper flakes
1/4 tsp oregano
dash of paprika (a bit less then 1/4 tsp)
dash of cayene pepper
1 tsp brown sugar 
sea salt and a few grinds black pepper
1 tempeh cake
olive oil
Burger buns for serving, toasted
avocado and bell pepper, shredded cheese for topping

Add the onion, celery, carrot and garlic to a frying pan with a bit of olive oil. Saute until softened. Add in the tomato sauce, vinegar and sauces and spices and sugar. Stir until well mixed. Cover and simmer over low heat 5-10 minutes.

While this sauce is cooking, chop up the tempeh and fry with a bit of olive oil in a separate pan about 5 minutes or until browned. Let cool until you can handle it. Then crumble into small pieces. Add the tempeh to the sauce mixture. Let simmer about 5 minutes.

Serve over toasted bread with toppings as desired. Enjoy!

_7004342

Tuesday, March 20, 2012

Channa Masala

So, blog? How's it going?

I have been up to my ears this spring in photo editing and such, so this blog has sadly fallen by the wayside. However, soon enough, especially later this summer, I have high hopes to get on the more regular blog train! (This may or may not have to do with exciting announcements that involve states called Vermont.)

On to the food. Alex and I have pretty much given up cooking meat for most meals during the week. A. We've decided we're only consuming sustainably raised stuff. and B. it's turned out quite a bit cheaper to eat mostly veggie, which is lovely. and C. These veggie dishes are super quick and easy, and flavorful, which is awesome for a weeknight meal.


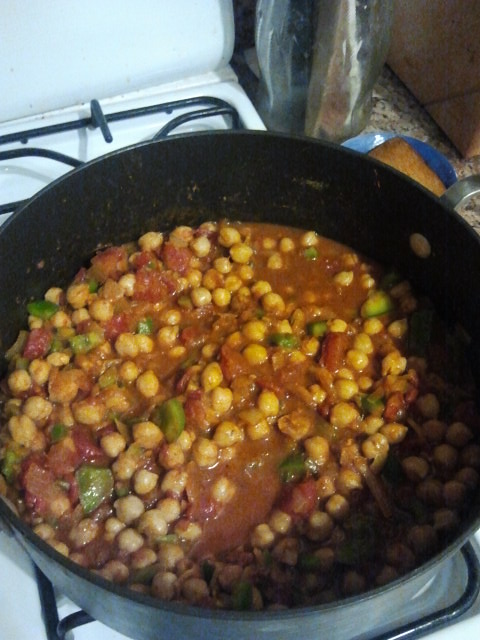
As if to prove how lazy I was feeling last night. I didn't want to grab my actual camera. Sorry for the cell phone photo!

I was in the mood for something Indian flavored last night, and remembered starring Smitten Kitchen's recipe awhile ago, so figured I'd give it a try.

I made this in like 25 minutes, which is great for any night of the week I think! It was fairly spicy, but pretty tasty! I'm betting on it tasting even better as leftovers, as I don't think it had quite enough to cook and let the flavors meld as we were mighty hungry! I was tempted to add some potato as well, which I might do next time.

Chana Masala
Adapted from Smitten Kitchen

A bit of olive oil
2 medium onions, diced
4 cloves garlic, minced
2 teaspoons grated fresh ginger
1 hot green chili pepper, minced (we used jalapeno, as that's what we had)
1 tablespoon ground coriander
2 teaspoons ground cumin
1/2 teaspoon ground cayenne pepper (I used more a heaping 1/4)
1 teaspoon ground turmeric
2 teaspoons paprika
1 teaspoon garam masala
1 15-ounce can of diced tomatoes, (smaller diced is better)
1 bell pepper, diced
2/3 cup water
4 cups cooked chickpeas or 2 (15-ounce) cans chickpeas, drained and rinsed
1/2 teaspoon salt
juice of 1 lemon

Add onion, garlic, ginger and pepper and sauté over medium heat with oil until browned, about 5 minutes. Turn heat down to medium-low and add the coriander, cumin, cayenne, turmeric, paprika and garam masala. Cook with spices for a minute or two, then add the tomatoes with their juice and the bell pepper. Add the water and chickpeas. Simmer uncovered for 10 minutes, then stir in salt and lemon juice.

Enjoy!


We had ours over a bed of quinoa, but rice would be tasty as well!

Sunday, January 29, 2012

Gado Gado

Remember when I had a blog? Sorry for the hiatus! Things were little crazy over here in December, and then we went to Argentina! Hurray! Photos and stories to come soon, I promise.

I haven't cooked a new recipe in awhile, a fault of the crazy schedule the end of the year held for us. However, this weekend I finally got to the library and picked up some fun new cookbooks. Alex has the tradition of often picking the strangest sounding thing possible from any menu (unless something has the word chiptole in it) and thus he instantly was drawn to this recipe for Gado Gado from a Moosewood cookbook. It's apparently Indonesian specialty and turned out really tasty!

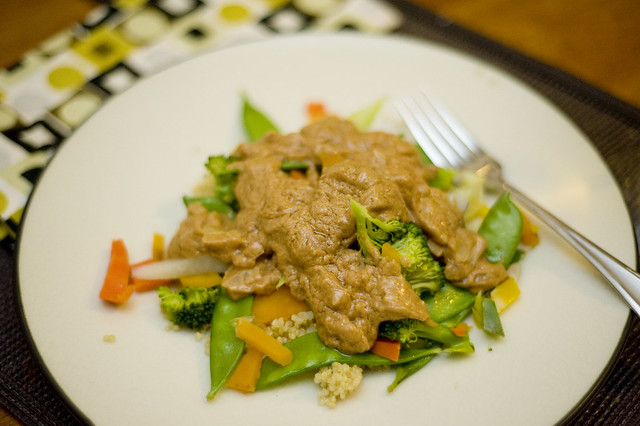
It was pretty easy to make, you could totally alter it to suit whatever veggies you have in the house, and, most importantly, it was delicious. Clearly evidenced by Alex having THREE full plates. (Ah, the joys of keeping a hungry husband full. Someday I'll have leftovers again. :-) )

Gado Gado
Adapted from Moosewood Restaurant Daily Special

I halved the recipe that was originally in the book for the sauce, and mixed up the veggie portion a bit to suit our tastes and what we had in stock. The original recipe also calls for 2 TBS of lime juice in the sauce, which I completely forgot!

The recipe calls for this to be served on a bed of spinach or rice, we went for quinoa. I think cous cous would also be good!

Sauce:

Canola Oil (a few tsp)
1 onion, chopped
3-4 garlic cloves, minced
1/8 tsp cayenne
1/2 jalepeno or other chile, finely chopped
1 TBS ginger root, peeled and grated
1 cup natural peanut butter (the stuff that JUST has peanuts!)
1.5 cups water or veggie stock (I used half and half)
1/8 cup cider vinegar
1.5 tsp soy sauce
pinch salt
1.5 tsp brown sugar

Saute up the onions and garlic in a sauce pan with a bit of oil until softened. Add in the spicy pepper and cayenne and ginger. Cook for a few more minutes.

In a bowl, combine the peanut butter with about .5 cup of stock until blended, then slowly add the rest of the liquid. Once it's smoothly combined, add to the onion mixture. Stir in the vinegar, soy sauce, salt, and brown sugar. Cover and simmer over low heat, stirring now and then for about 10-15 minutes. If your sauce gets too thick, add a bit more stock until it's the consistency you'd like.

Veggies

2 small sweet potatoes, peeled, cut in small slices
1 small red potato, cut in small slices
1/3 cup diced carrots
1 cup bite size broccoli florets
1/2 cup cauliflower, bite size pieces
1/2 bell pepper, chopped
handful snap peas

I steamed all the vegetables in one big pot over a metal steamer. First, add the potatoes, steam about 7 minutes. Add the carrots on top and steam about 3 minutes more. Then add the broccoli and cauliflower and steam another 5 minutes. Add the pepper and snap peas and steam for a final 3 minutes or so.

Serve the veggies over a plate of quinoa, then top with the peanut sauce!

Enjoy!

DSC_8694
(It's not the prettiest dish, but it's TASTY! I promise!)

Sunday, November 27, 2011

Savory Herb Bread

I hope you all had a wonderful Thanksgiving holiday! We hosted a couple friends again this year, though it was a lot tighter fit then in our previous apartment in Bushwick! I made a pretty good spread, including turkey and gravy, garlic mashed potatoes, corn bread stuffing, some other assorted veggies and a salad, and a pumpkin pie. I think this may be the first year I've managed everything without stressing out and getting everything done at the same time on schedule! So for that, I was proud. 4 times is the charm apparently. And considering the size of my tiny Brooklyn kitchen now, that is no small feat! :-)

In any case, the new thing I added to the menu this year was bread from scratch! I've been wanting to make homemade yeasted bread for awhile now, but have never gotten around to it. I've done pita bread and pizza dough, but not actual loaves of bread. I spotted this recipe in my Cafe Brenda cookbook and it sounded lovely for a Thanksgiving meal, so I went for it. This was probably the last time of the season to get fresh herbs at the farmers market, so it was especially great for that!

Though bread making takes awhile, it's not active cooking for the whole time, mostly you just have to wait for things to rise. So, for a Thanksgiving cooking day, this was perfect to throw together, leave it alone for a few hours, and then pop in the oven.

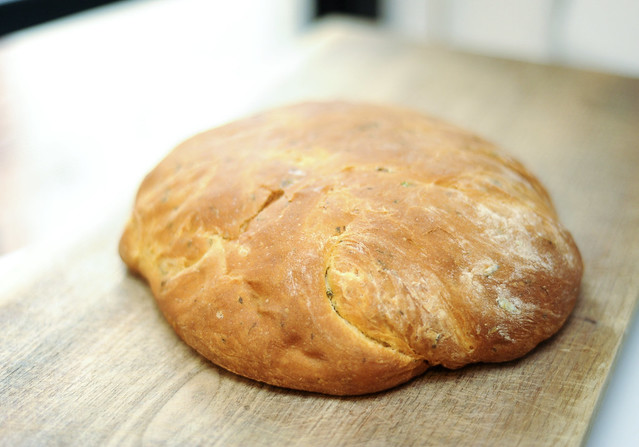
And, it was DELICIOUS!

DSC_2621

Savory Herb Bread
Cafe Brenda Cookbook

Makes two loaves

1.5 Cups warm water
1.5 TBS active dry yeast (about 1.5 packets)
1/4 cup honey
4 - 4.5 cups flour
2 tsp chopped fresh chives
2 tsp chopped fresh parsley
1 tsp chopped fresh thyme
up to 2 TBS other chopped herbs such as marjoram, basil, or oregano (or slightly less dried)
1/2 tsp salt
2 TBS oil

Add the warm water and yeast to a large bowl and mix together until the yeast dissolves. Add in the honey and stir well. Add in 2 cups of flour and mix together. Set aside the mixture while you chop all the herbs. Then add in herbs, salt and oil and stir. Then add the remaining flour 1 cup at a time. Once the dough has come together, turn onto a floured work surface and knead well for a few minutes. Place in an oiled bowl and cover. Let rise in a warm place for an hour. Punch the dough down and knead a couple times for air bubbles, then separate into two loaves. I did one circle flat loaf and one regular bread loaf, as we only have one rather decrepit loaf pan. (Santa! Hint: we could use a new loaf pan! :-) ) Place the loaves either on a buttered cookie sheet or in a loaf pan. Cover and let rise for another 45 minutes to an hour.

Bake at 350 for 50 minutes. (Note: Our oven runs quite hot, and I peeked in at about 20 minutes and the dough was already starting to brown. I turned the heat down to about 325-300 and it turned out well. So be sure to keep an eye on things once you start to bake.)